Easy No-Bake Pink Marshmallow Dessert Squares with Dried Fruit
June 29, 2026If you’re looking for a nostalgic dessert that’s creamy, fluffy, colorful, and incredibly easy to prepare, these No-Bake Pink Marshmallow Dessert Squares are the perfect choice. This classic refrigerator dessert combines soft marshmallows, sweet cream, fruity flavors, and chewy dried fruit into one refreshing treat that looks just as impressive as it tastes.
One of the best things about this recipe is that it requires no oven, making it ideal for warm weather, busy holidays, family gatherings, birthday parties, or whenever you need a simple dessert that can be prepared ahead of time. After a few hours in the refrigerator, the mixture firms up beautifully and slices into neat, colorful squares that everyone will love.
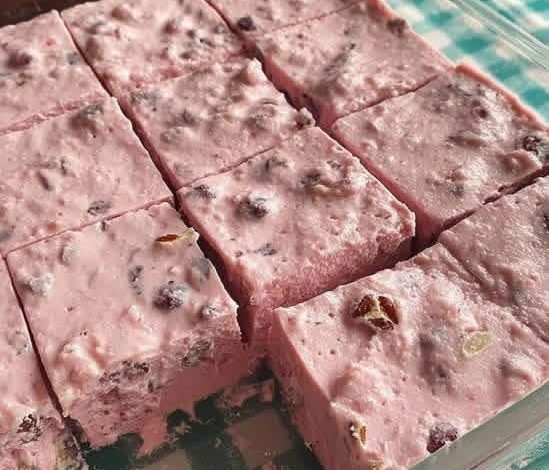
The creamy texture pairs perfectly with the chewy dried fruit, while the light pink color makes this dessert especially eye-catching on any dessert table. Although this recipe is wonderfully simple, the final result looks like something made by a professional baker.
Why You’ll Love This Recipe
- No baking required.
- Easy enough for beginners.
- Perfect make-ahead dessert.
- Rich, creamy, and fluffy texture.
- Great for holidays, birthdays, baby showers, and family dinners.
- Can easily be customized with different dried fruits, marshmallows, or flavor extracts.
- Beautiful presentation with very little effort.
Preparation Time
- Preparation: 20 minutes
- Chilling Time: 6 hours or overnight
- Total Time: Approximately 6 hours 20 minutes
- Servings: 16 squares
Ingredients
- 4 cups mini marshmallows
- 2 cups heavy whipping cream
- 8 ounces cream cheese, softened
- ½ cup powdered sugar
- 1 teaspoon vanilla extract
- 1 teaspoon strawberry extract (optional for extra flavor)
- Pink food coloring (optional, just a few drops)
- 1 cup chopped dried cranberries
- ½ cup golden raisins
- ½ cup chopped dried cherries
- ½ cup chopped pecans or walnuts (optional)
Equipment Needed
- Large mixing bowl
- Electric mixer
- Rubber spatula
- 8×8-inch or 9×9-inch glass baking dish
- Plastic wrap
- Sharp knife
Step 1: Prepare the Cream Cheese Mixture
Place the softened cream cheese into a large mixing bowl. Beat it with an electric mixer until completely smooth and creamy. This step is important because it creates the silky base that holds everything together.
Add the powdered sugar and continue mixing until no lumps remain.
Step 2: Add the Flavoring
Mix in the vanilla extract. If using strawberry extract, add it now as well. For the beautiful pink color shown in the dessert, stir in a few drops of pink food coloring until the desired shade is reached.
Step 3: Whip the Cream
In a separate bowl, whip the heavy cream until stiff peaks form.
Take your time during this step because properly whipped cream gives the dessert its light and fluffy texture.
Step 4: Fold Everything Together
Using a rubber spatula, gently fold the whipped cream into the cream cheese mixture.
Fold slowly to keep as much air in the mixture as possible. This creates an incredibly soft and creamy dessert.
Step 5: Add the Marshmallows
Stir in the mini marshmallows, making sure they are evenly coated throughout the creamy mixture.
Each bite should contain plenty of marshmallows for the perfect chewy texture.
Step 6: Add the Dried Fruit
Fold in the dried cranberries, golden raisins, and chopped dried cherries.
If you enjoy extra texture, stir in the chopped pecans or walnuts as well.
The dried fruit adds bursts of sweetness and slight tartness that balance the creamy filling perfectly.
Step 7: Transfer to the Dish
Lightly grease a square glass baking dish or line it with parchment paper.
Spread the mixture evenly into the dish.
Use the back of a spoon or an offset spatula to smooth the top.
Step 8: Chill
Cover the dish tightly with plastic wrap.
Refrigerate for at least six hours.
For the cleanest slices and best texture, refrigerate overnight.
Step 9: Slice and Serve
Once fully chilled, remove the dessert from the refrigerator.
Use a sharp knife dipped in warm water before each cut for perfectly smooth squares.
Serve cold for the best flavor and texture.
Serving Ideas
- Serve with fresh strawberries.
- Top with whipped cream.
- Sprinkle with toasted coconut.
- Add shaved white chocolate.
- Serve alongside coffee or tea.
- Pair with fresh raspberries.
- Decorate with mint leaves.
- Drizzle lightly with strawberry sauce.
Recipe Variations
Tropical Version
Replace the dried cranberries with chopped dried pineapple and mango.
Chocolate Version
Add mini chocolate chips for a richer dessert.
Nut Lover’s Version
Double the pecans or walnuts for extra crunch.
Mixed Berry Version
Add freeze-dried strawberries, raspberries, or blueberries.
Holiday Version
Mix red and green mini marshmallows for a festive appearance.
Helpful Tips
- Always use softened cream cheese.
- Do not overmix after adding whipped cream.
- Chill overnight whenever possible.
- Use a hot knife for clean slices.
- Store covered to keep the dessert fresh.
Storage
Store leftovers covered in the refrigerator for up to four days.
This dessert is not recommended for long periods at room temperature because of the dairy ingredients.
If preparing in advance for a party, it can easily be made the night before.
Frequently Asked Questions
Can I use fresh fruit?
Yes, but fresh fruit releases moisture. If using fresh berries, add them just before serving for the best results.
Can I freeze it?
Yes. Wrap individual portions tightly and freeze for up to one month. Thaw overnight in the refrigerator before serving.
Can I make it less sweet?
Absolutely. Reduce the powdered sugar slightly or use unsweetened whipped cream.
Can I make this recipe ahead of time?
Yes. In fact, this dessert tastes even better after chilling overnight because the flavors have more time to blend together.
Final Thoughts
These Easy No-Bake Pink Marshmallow Dessert Squares are proof that simple ingredients can create a beautiful dessert everyone will enjoy. Their creamy texture, soft marshmallows, colorful appearance, and bursts of chewy dried fruit make every bite both comforting and refreshing.
Whether you’re preparing dessert for a holiday celebration, a family reunion, a birthday party, or simply looking for an easy no-bake treat, this recipe is sure to become one of your favorites. It’s easy to customize, easy to prepare, and guaranteed to disappear quickly once it’s served.
Disclaimer
This recipe and accompanying content are provided for informational and entertainment purposes only. Results may vary depending on ingredients, equipment, and preparation methods.